Why wait for seeds when you can root cannabis clones in as little as 7 to 14 days and produce identical plants in a fraction of the time? Cloning allows you to replicate your best genetics easily, saving weeks of waiting and giving you more control over your garden.
The cloning process is a true game changer in the cannabis industry. Not only does it save time, but it also preserves desirable traits like strong stems, abundant foliage, and natural resistance to stress or pests. By learning how to quickly get clones to root, you can produce healthy new plants efficiently and expand your crop with confidence.
How Cannabis Clones Develop Roots
Clones develop roots when placed in the right environment, which includes controlled humidity, consistent moisture, gentle light, and proper airflow. Rooting typically begins within 7–10 days under optimal conditions. The exact timeline can vary depending on the strain, the method used, and the conditions in your grow room.
When you’re taking a cutting from a healthy cannabis plant, the stem begins a remarkable transformation. Stored carbohydrates and nutrients are mobilized from older leaves to support callus formation and new root development at the cut site.
Why Moisture and Oxygen Matter
Moisture and oxygen are critical for roots forming successfully. The medium must be damp but not waterlogged to prevent rot. Adequate airflow ensures oxygen availability at the root zone, which is essential for cellular respiration and root development. Overly dry conditions stress the plant and slow root formation.
Balancing these factors helps your clone establish roots faster and reduces the risk of early growth issues.
Why Lower Leaves Turn Yellow
You may notice lower leaves turning yellow during the first week. This is perfectly normal as the plant moves nutrients from older growth to support root formation.
Some dying or dead growth is expected. It indicates the clone is prioritizing new roots over older foliage, not that it’s failing. Excessive yellowing, mushy stems, or foul odors, however, may indicate overwatering or infection rather than normal nutrient redistribution.
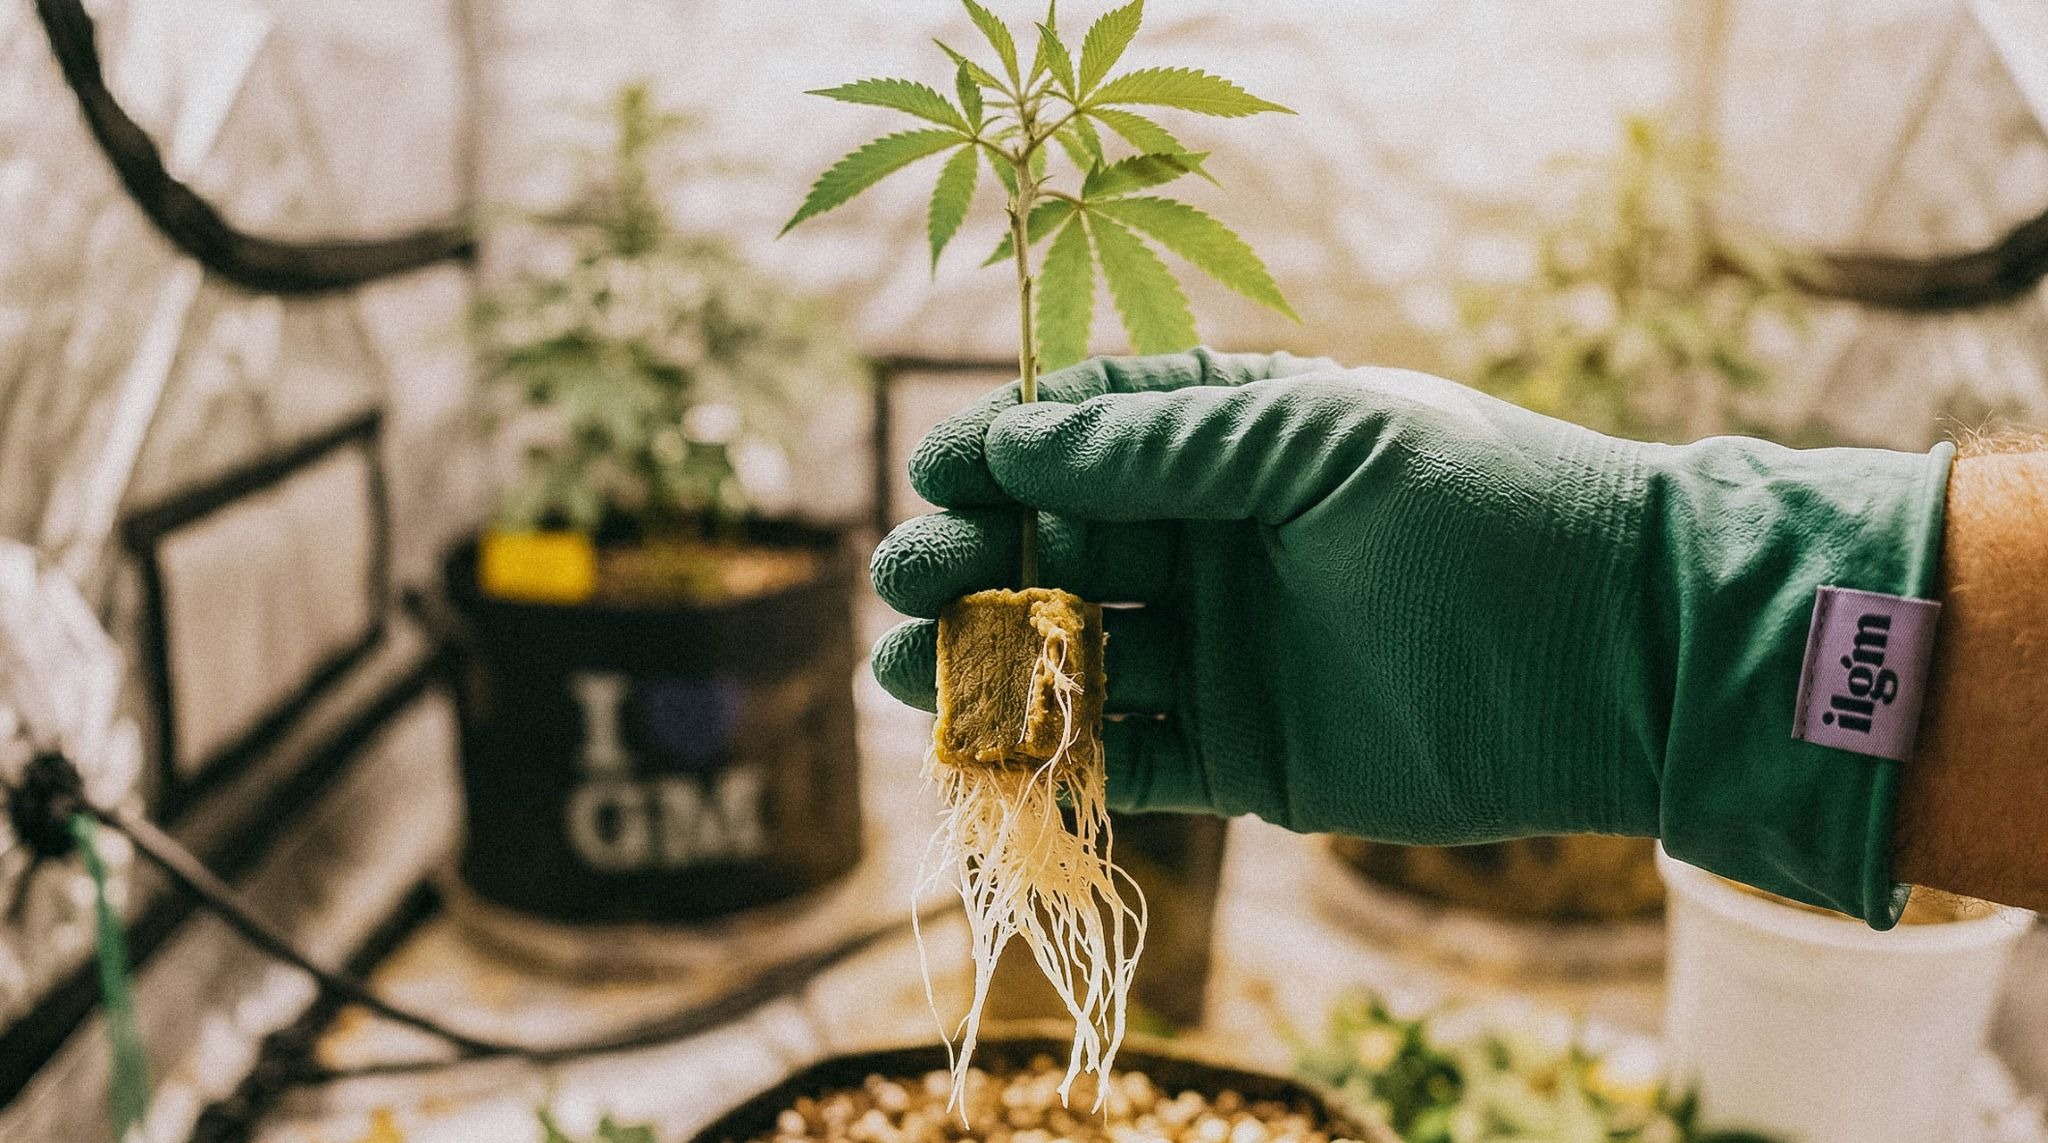
How Long Roots Take to Develop
Healthy roots typically appear in about a week, but reaching roughly an inch can take longer depending on:
- Genetic differences between cultivars
- Growing medium
- Environmental conditions like temperature, humidity, and airflow
Recognizing this timeline prevents unnecessary panic when some cuttings take slightly longer to establish.
The Role of Root Guardian in Early Root Development
Rooting hormones and microbial stimulants like Root Guardian support early root formation by strengthening the root zone and promoting healthy microbial activity. Applying a root stimulant during the first watering helps new clones settle, reduce stress, and develop stronger, healthier roots.
Consistent use improves root resilience and sets the foundation for vigorous long-term growth.

Equipment and Materials for Cannabis Clones
Selecting a healthy parent plant is the first step in successful cloning. A strong, vigorous plant ensures your cuttings inherit desirable traits and start with a natural growth advantage.
The right mother plant can make the difference between a thriving new crop and a struggling set of clones.
Choosing the Growing Medium
Your growing medium plays a significant role in early root establishment and overall clone success. Options like soil, coco cubes, peat plugs, or water cloning work well when kept consistently moist and properly aerated.
Quality plugs or cubes offer reliable moisture control and gentle support for delicate roots, helping prevent rot or overly wet conditions. Soil or coco can also produce strong clones, though they require closer monitoring to avoid waterlogging or dryness.
For a full breakdown of what you’ll need, see our guide to essential growing supplies. Understanding each medium allows you to create the right environment for roots to form efficiently. We recently started using BudTrainer’s BudCups and we can’t imagine starting our clones with anything else as a pot now!
Tools and Support Materials
Using sterile tools and fresh razor blades is critical to prevent infection and ensure clean cuts. Humidity domes create a controlled environment that promotes root growth while helping clones adjust gradually to their surroundings.
Lighting and Airflow
Lighting plays an important role in encouraging root expansion. Low-intensity LED or fluorescent lighting (approximately 100–200 PPFD) provides sufficient energy for photosynthesis without increasing transpiration stress. Once clones are rooted and entering veg, you’ll want to dial in your cannabis light schedules for the next stage of growth.
Airflow is equally important. Circulation prevents stagnant, wet conditions while still maintaining adequate moisture for roots to form. Properly ventilated grow spaces help clones thrive and reduce common problems like mold or rot.
Preparing for Cloning (Before You Take the Cuttings)
Preparation is key to successful cloning. Before you take your cuttings, get your space and tools ready so your clones have the best shot at thriving. Keeping things clean, humid, and just the right amount of moisture helps roots grow strong from the start.
Sterilizing All Tools: Take time in the beginning to make sure your tools are clean and sterilized. This will give your new cutting the best chance to establish healthy roots and prevent infections from taking hold early. Clean, sharp tools also make precise cuts, reducing stress on the clone and improving overall rooting success.
Setting Up Your Grow Room: A properly prepared grow space significantly affects how well your clones will root. Maintain consistent humidity, stable temperature, and low lighting to create an environment that encourages healthy growth without stressing the cuttings. Small fluctuations can slow root growth or cause leaves to wilt.
Preparing the Humidity Dome: The humidity dome should be in place before taking your cuttings. It traps moisture around the clone, creating a controlled microenvironment that protects delicate stems while promoting new roots. Maintain relative humidity around 70–80% during the first several days, gradually lowering it once roots begin to form.
Moisture Management in the Medium: Your growing medium should be moist but not wet. Overly saturated conditions can lead to root rot, while a dry medium prevents roots from forming efficiently.
Applying a Rooting Stimulant: After taking the cutting, apply a rooting hormone or gel during the first watering. It strengthens the root zone and kickstarts early root growth, giving your new clone a strong start.
Step-by-Step: How to Take Cuttings the Right Way
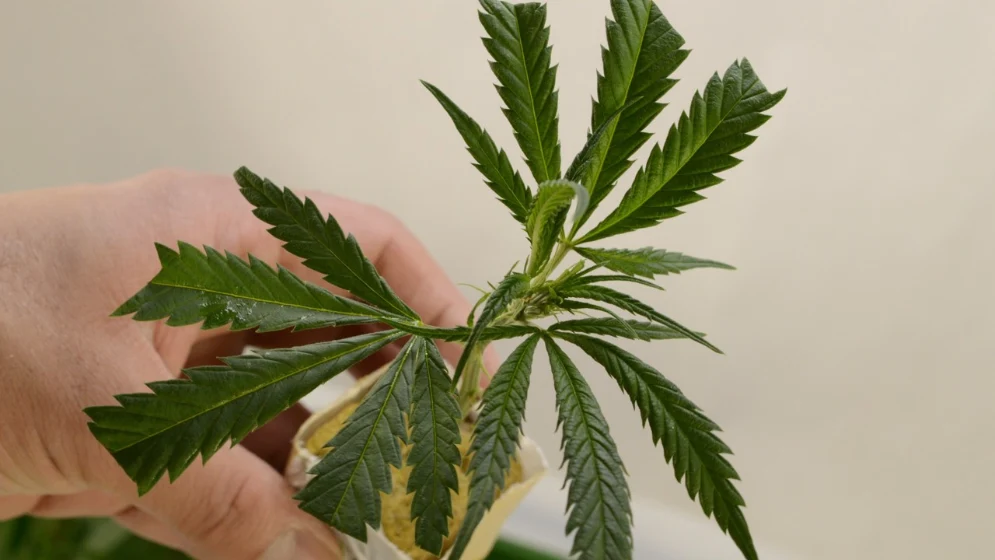
1. Select the Right Cutting
Choose a healthy stem that’s 4–6 inches long. This length gives you enough nodes for root development while keeping the cutting manageable.
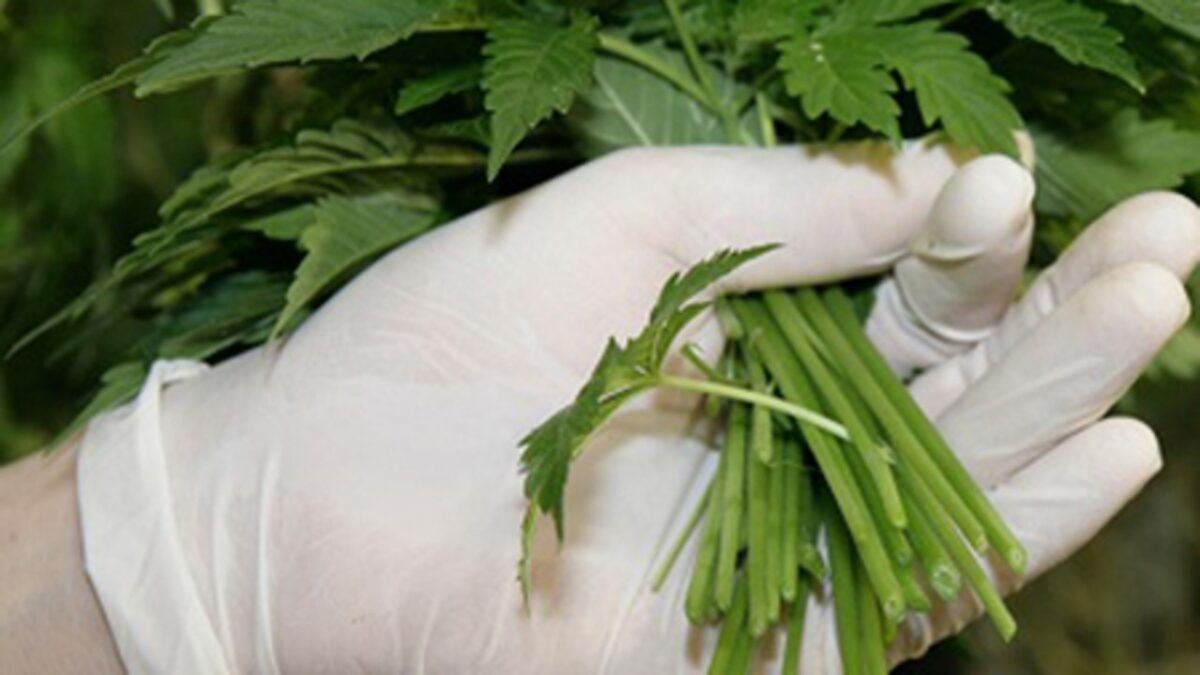
2. Prepare the Cutting
Remove the lower leaves so nothing touches the growing medium. This prevents rot and helps direct the plant’s energy toward forming roots. Some growers lightly scrape the stem to expose inner tissue, allowing cloning gel, or other boosters to absorb more effectively. Scrape gently to avoid damage.
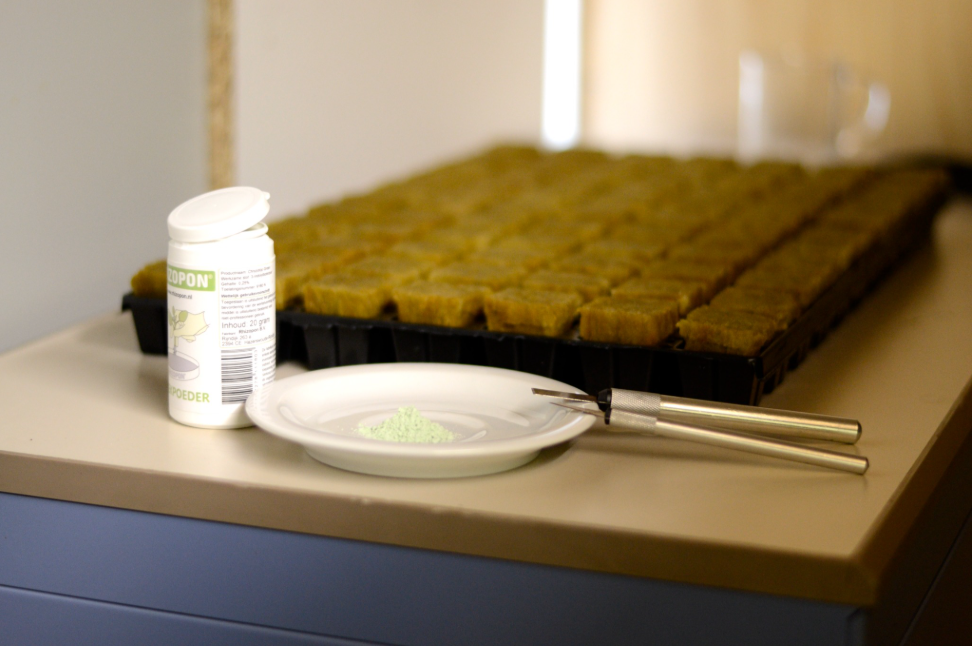
3. Apply Rooting Hormone or Gel
Dip the cut end in a rooting hormone, cloning gel, or a product like Root Guardian to support quick, strong root formation. This reinforces the root zone and reduces early stress, helping the clone adjust smoothly.
4. Insert the Cutting Into the Medium
Place the stem into your rooting medium and secure it upright. A stable cutting anchors more easily and experiences less stress. Make sure the medium balances moisture and airflow for early root development.
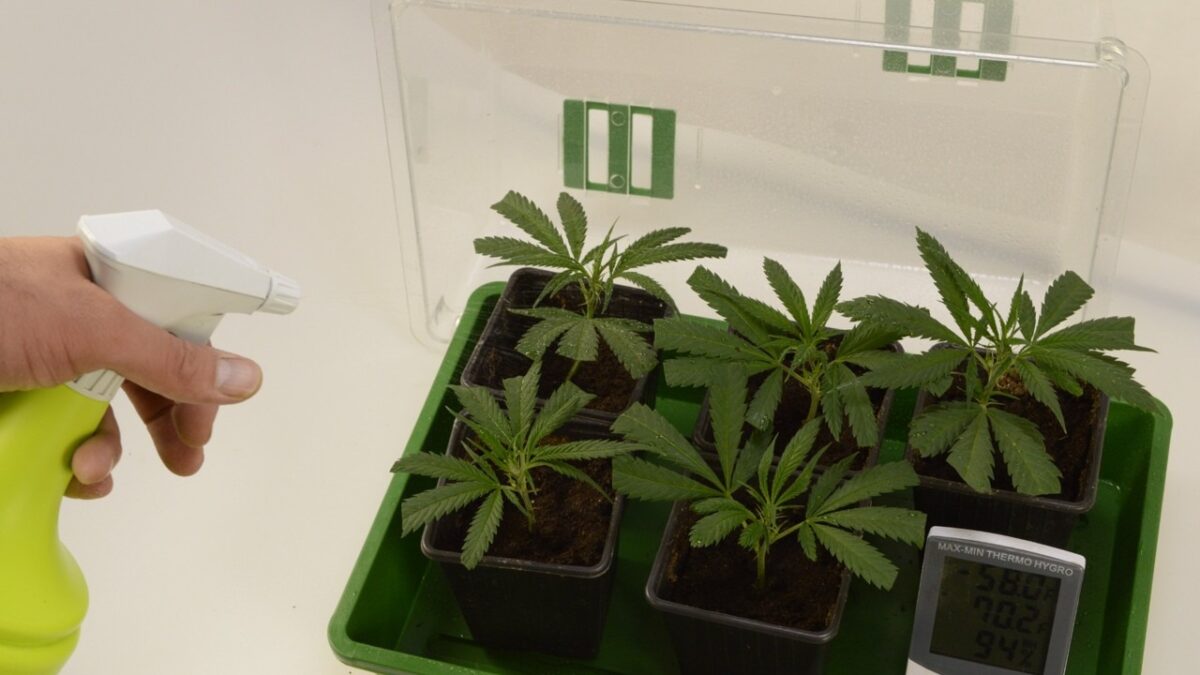
5. Maintain Moisture and Humidity
Mist lightly and place the cutting under a humidity dome. This controlled environment keeps the clone from drying out while preventing overly wet conditions in the medium.
Quick Reference Checklist
Cutting length: 4–6 inches
Remove lower leaves
Lightly scrape stem if desired
Secure in medium, upright
Mist lightly under humidity dome
Use tap or filtered water
Setting Up the Perfect Environment for Fast Root Growth
Creating the right environment is critical for encouraging root expansion in cannabis clones. The first week is especially important, as cuttings are highly sensitive to moisture, light, and airflow. Here’s exactly what you should look out for.
- High humidity during the first week prevents cuttings from drying out. Excessive dryness can cause wilting, while too much moisture drives rot. Finding the right balance ensures the clone can absorb nutrients and start forming roots successfully.
- Light should be soft, providing enough energy for photosynthesis without stressing the cutting. Avoid strong, direct light that can scorch leaves, slow growth, or interfere with root expansion. Fluorescent or LED grow lights are ideal for maintaining consistent, safe illumination.
- Balanced airflow prevents stagnant air that can lead to mold or disease, while ensuring the medium doesn’t dry out. Maintain a stable temperature, warm enough to promote root formation but not so hot that it stresses the clone.
- Avoid overwatering or constant misting, which can lead to wet conditions and root rot. Allowing the medium to dry slightly encourages the roots to search for moisture, strengthening the root system naturally.
- After the first week, gradually reduce misting once roots begin forming so the cutting shifts from foliar moisture dependence to root-based water uptake. This step helps new plants build resilience and prepares them for transplanting into their next medium.
How Long Do Cannabis Clones Take to Root? (Expected Timeline)
Cannabis clones generally begin developing visible roots in about a week, but the timeline can vary depending on strain, environment, and cloning method. Knowing this timeline helps growers set realistic expectations and provide the best care for each cutting.
Quick Reference Timeline for Rooting
| Stage | What to Expect |
| Day 3 | Swelling nodes and tiny bumps appear at the base of the stem |
| Day 7 | Small roots become visible, nutrient shift from lower leaves |
| Day 10 to 14 | Roots typically reach about an inch, ready for transplant |
| Ongoing | Monitor for unusual wilting, rot, or discoloration |
Early Signs: Day 3
By day three, small bumps or swelling may appear at the base of the stem. These signs indicate that new roots are starting to form and that the clone is adjusting well. Expect the lower leaves to turn a light yellow as nutrients move toward the developing root system.
Visible Roots: Day 7
Around day seven, roots are often visible when the medium is gently examined. Some strains may take slightly longer, so patience and continued support are key to ensuring healthy root development.
Strong Root Growth: Day 10–14
By day 10–14, roots usually reach a length suitable for safe transplantation. Soil, rapid rooters, and water cloning produce viable roots, though growth rates may vary slightly depending on the method and strain.
Monitor Ongoing Progress
It’s perfectly normal for some cuttings to take longer than others. Signs like yellowing lower leaves, slight wilting, or minor leaf curl don’t always indicate a problem.
Monitoring progress carefully helps growers distinguish between normal development and early signs of trouble. Healthy cannabis clones will steadily produce new roots while adapting to their environment, ensuring a strong foundation for the new crop.
How to Tell If Your Clones Are Rooting (or Not)
Knowing how to tell if clones are rooting can save growers time and prevent unnecessary stress. Early detection allows you to adjust care and support healthy root development. Here are the key things to keep an eye on.
Key Signs Your Clones Are Rooting
| Sign | What to look for | Why it matters |
| Swelling nodes / bumps | Small protrusions at the stem base | Indicates roots are forming internally |
| Tiny roots | Visible along edges of medium or stem | Confirms active root development |
| Stem firmness | Slightly flexible, vibrant green | Shows clone is healthy and not rotting |
| Lower leaf yellowing | Light yellowing in older leaves | Nutrient reallocation to support root expansion |
| Condensation in dome | Moderate, not excessive | Maintains moisture without causing wet rot |
| Resistance test | Slight anchoring when tugged | Confirms roots are established enough to support transplant |
Monitoring these signs allows growers to support their clones effectively, and proactively adjusting the environment prevents minor issues from becoming major problems.
Troubleshooting: Why Clones Aren’t Rooting (And How to Fix It Fast)
Sometimes clones fail to root despite careful preparation. Recognizing common issues helps growers take corrective action quickly and improve success rates.
Overwatering or Wet Medium
Excess water prevents oxygen from reaching the stem and roots. Root initiation depends heavily on oxygen availability at the cut site; saturated media reduce oxygen diffusion and significantly slow development. Constant misting can lead to rot and fungal problems, which can quickly overwhelm delicate cuttings. Ensuring the medium is moist but not saturated is essential for enough root development.
Weak or Unhealthy Parent Plant
Cuttings from stressed or nutrient-deficient plants often struggle to establish roots. Selecting vigorous, healthy parent plants gives clones a strong start and increases the likelihood of successful rooting.
Light and Heat Stress
Excessive light or high temperatures can cause wilting and slow root formation. Adjusting grow space conditions to provide soft indirect, and stable warmth helps cuttings focus their energy on developing strong roots.
Old or Degraded Medium
Using old mediums reduces their ability to balance moisture and support root formation. Fresh mediums ensure proper airflow and provide the physical support that roots need to grow efficiently.
Cuttings Still Alive but Not Rooting
Sometimes clones remain alive but fail to form roots. This indicates suboptimal environmental conditions. Assess humidity, airflow, and light before gently testing for root resistance to identify issues before they become critical.
Quick Troubleshooting Table
| Problem | Possible Cause | How to Fix It |
| Rotting or yellowing | Overwatering / constant misting | Reduce moisture, improve airflow, use fresh medium |
| No root development | Weak mother plant | Take cuttings from a healthier, vigorous plant |
| Wilting or stress | Too much light or heat | Adjust light intensity and room temperature |
| Poor anchoring | Old or degraded medium | Use fresh rapid rooters, soil, or cubes |
| Alive but no roots | Suboptimal environment | Check humidity, airflow, and moisture; perform resistance test |
Pro tip: If cuttings fail to respond despite adjustments, it may be necessary to begin again with fresh cuttings and medium. Every attempt helps refine your cloning method and improves overall rooting success.
When to Transplant
Once roots reach an adequate length, typically about an inch, clones should be transferred into a suitable medium. This allows the plant to establish a robust root system capable of sustaining life and supporting vigorous growth.
Working With Different Strains (Why Some Root Slower)
Indica-dominant strains like Northern Lights and Afghan tend to develop roots faster, often within about 7 days. Sativa-dominant strains like Amnesia Haze and Durban Poison can take 10 to 14 days to establish healthy root systems. Knowing these differences helps growers adjust care and set realistic expectations for each cutting.
| Strain Type | Rooting Speed | Care Tips |
| Indica (e.g. Northern Lights, Afghan) | Fast (around 7 days) | Standard moisture, moderate light, steady airflow |
| Sativa (e.g. Amnesia Haze, Durban Poison) | Slower (10 to 14 days) | Consistent moisture, avoid strong light, monitor humidity closely |
| Hybrid (e.g. Blue Dream, White Widow) | Medium (7 to 10 days) | Adjust care based on dominant traits |
| Older growth cuttings | Slower | Ensure nutrients are available, monitor yellowing leaves |
| New growth cuttings | Faster | Standard care, maintain humidity and airflow |
Supporting Slow-Rooting Strains
Some strains may struggle to root quickly. Consistent moisture, easy airflow, and proper light levels are crucial to encourage enough root development. Avoid overwatering or intense light, which can stress the cutting and slow progress.
Understanding Older vs. New Growth
Older growth behaves differently than new growth on a cutting. Nutrients move from older leaves to support root formation, so minor yellowing or dieback during the first week is perfectly normal.
Keep Track of Strains and Results
Maintaining a record of each strain’s rooting times is a valuable practice. Tracking what works for each strain allows growers to refine their methods and improve success in future crops. Consider using a clone tent if you have many going at once; it’s a life saver.
Choosing the Right Mother Plant
Healthy mothers are crucial for consistent rooting success. Vigorous plants provide cuttings with enough energy and valuable nutrients to establish strong roots efficiently, ensuring a robust new grow.
Starting with strong genetics matters. Growing your mother plant from feminized cannabis seeds ensures you’re working with female plants from the start. Understanding the cannabis growth stages helps you identify the right moment to take cuttings, ideally when the mother is a few months into veg with solid branching and thick stems.
After Your Clones Root: Next Steps
Once your clones have developed roots about an inch long, they’re ready to move into a larger medium that can sustain life and encourage healthy growth. The following steps will help ensure your young plants continue to develop strong roots without stress.
- Carefully remove the humidity dome once roots are established. Gradually exposing clones to normal humidity helps prevent shock and allows the plant to adjust to its new environment naturally. Sudden changes in humidity can slow growth or damage delicate roots.
- Handle clones gently to avoid breaking fragile roots. Place each cutting securely in its medium and ensure the stem remains upright. Proper placement helps roots expand evenly and supports stable plant growth as the clone acclimates. If you want to ensure the best possible start we recommend Budtrainer BudCups perfect self draining starter pots with easy transplant system.
- After transferring, maintain a consistent balance of moisture and airflow. Keep the medium evenly moist without overwatering, and ensure gentle circulation around the plants. Monitor lower leaves carefully, as some yellowing is normal while roots adapt to the new environment.
- Begin feeding gradually once the roots are established. Start with mild nutrient levels and slowly increase as the clone strengthens. Transitioning to stronger light should also be done gradually to avoid stress while encouraging vigorous vegetative growth.
Start Strong: From Cutting to Confident Grow
Cloning cannabis becomes far more predictable when environmental variables such as humidity, temperature, oxygen availability, and sanitation are carefully controlled. Understanding certain techniques like starting with a healthy mother, managing balanced moisture, and keeping airflow and lighting gentle makes it much easier to support early root expansion while minimizing stress on fresh cuttings.
Yellowing or drying leaves are often normal as nutrients move from older growth to fuel new root development, so small changes aren’t a cause for panic. With these practices in place, you can confidently grow your clone lineup.
If you’re ready to take the next step, explore our clone selection and start your next cycle with proven, reliable genetics. Our hand-selected clones make it easier to begin strong, grow confidently, and enjoy consistent results from the very first day. Don’t have a mother plant yet? Start with beginner-friendly seeds and grow your own cloning source from the ground up.
FAQs on How to Root Cannabis Clones
Cloning cannabis can raise a lot of questions. Here are the key questions and answers that every grower should know about rooting and post-cutting care.
Why Won’t My Cannabis Clones Root?
Clones can fail to root if they’re overwatered, sitting in stagnant air, taken from a weak parent, or exposed to too much light or heat. Keeping the medium just moist, letting the air flow gently, and using a strong, healthy cutting will give your clone the best chance to take off.
Why Do Cuttings Fail to Root?
Cuttings usually fail when they’re stressed, damaged, or not set up in the right environment. Using weak branches, keeping the medium too wet, or messing up humidity and light can stop roots from forming.
Is It Better to Clone in Water or Soil?
Both work, but they have different strengths. Water cloning lets you watch roots grow, but they can be a bit weaker. Soil gives support, oxygen, and stronger long-term roots, helping clones settle in better.
How Old Should a Mother Plant Be Before Cloning?
You want a mother that’s mature, healthy, and vigorous. Usually, a plant a few months into its growth stages with solid patterns gives cuttings enough energy and nutrients to root and thrive.
Do Cloned Plants Lose Potency?
No. Clones keep all the traits of the mother plant, including potency. As long as they’re healthy and grown right, their effects and cannabinoid profile will match the original.
How to Grow a Clone From the Dispensary?
If purchasing a clone from a dispensary, it is already a rooted cutting. Place it in an appropriate medium, maintain moderate humidity for acclimation, and gradually transition it into your vegetative environment.
Can You Root Clones Without Rooting Hormone?
Yes. Cannabis clones can root in plain water or a moist medium without any rooting hormone or gel. The process may take a few days longer, but many growers successfully root cuttings with nothing more than clean water and the right environmental conditions. Rooting hormones and gels speed things up and improve consistency, but they’re not strictly required.
What if Cuttings Are Still Alive but No Roots?
If your cuttings are hanging on but not rooting, they’re probably stressed or in the wrong conditions. Adjust humidity, light, and moisture, and be patient. If they still don’t root after a while, it’s usually best to start fresh with a new cutting.